Published
- 5 min read
Ultimate Trampoline Assembly Guide: Pro Tips for Safe Setup
The Ultimate Trampoline Assembly Guide: Pro Tips for a Safe, Headache-Free Setup
Let’s be honest: assembling a massive 15-foot backyard trampoline is notorious for causing weekend meltdowns. The boxes weigh hundreds of pounds, the instructions are often poorly translated, and attempting to stretch that final, impossibly tight metal spring into place has bruised many knuckles and egos.
However, as someone who has supervised and performed dozens of commercial and residential installations, I can assure you that trampoline assembly doesn’t have to be a nightmare. It is entirely an exercise in physics and geometry. If you follow the correct sequence, the tension works for you, rather than against you.
In this expert guide, I will walk you through the professional workflow for assembling a standard backyard trampoline. I will share the secret “Cross-Pattern” spring method, highlight the essential tools you need from Amazon, and guarantee a safe, sturdy, and frustration-free setup.
1. Site Prep: The Foundation of a Great Bounce
Before you even open a box, you must prepare the ground. A trampoline on uneven ground is incredibly dangerous; it stresses the frame joints unevenly and can cause the entire structure to tip during an aggressive bounce.
- Find Level Ground: Use a long 2x4 board and a carpenter’s level to check your chosen spot. If the ground drops more than an inch or two, you must dig out the high side. Never use bricks or blocks of wood to prop up a short leg—they will shift during jumping.
- Clearance: Ensure you have at least 24 feet of vertical clearance (no low-hanging branches or power lines) and a 3-foot “fall zone” perimeter around the outside of the trampoline free of fences or retaining walls.
2. Assembling the Frame (The Metal Skeleton)
The frame usually consists of curved top rails and T-shaped or U-shaped legs.
- The T-Joint Secret: When connecting the curved top rails, the square T-joints are often very tight. Apply a tiny amount of WD-40 or silicone spray to the male ends of the pipes. They will slide together effortlessly.
- Don’t Tighten Yet: If your frame uses bolts, assemble the entire circle before you tighten them down. You need a little bit of “play” in the frame to get the final piece connected. Once the circle is closed, go around with a socket wrench and lock them down.
3. The “Cross-Pattern” Spring Technique (Crucial!)
This is where 90% of people fail. If you attach the springs in a circle, going 1, 2, 3, 4 around the perimeter, by the time you reach the other side, the tension will be so immense you won’t be able to pull the springs, and your mat will be warped.
You must distribute the tension evenly using the Cross-Pattern Method:
- The Compass Points: Attach the mat at the 12 o’clock position. Then go directly across and attach 6 o’clock. Next, attach 3 o’clock, followed by 9 o’clock.
- Sub-Dividing: Your mat is now a square. Find the exact middle point between 12 and 3, and attach a spring. Go directly across and do the same.
- Fill in the Gaps: Continue sub-dividing the empty sections, always working on opposite sides of the circle. By the time you get to the final springs, the tension will be perfectly distributed, and they will snap on easily.
The Required Tool: The Spring Puller
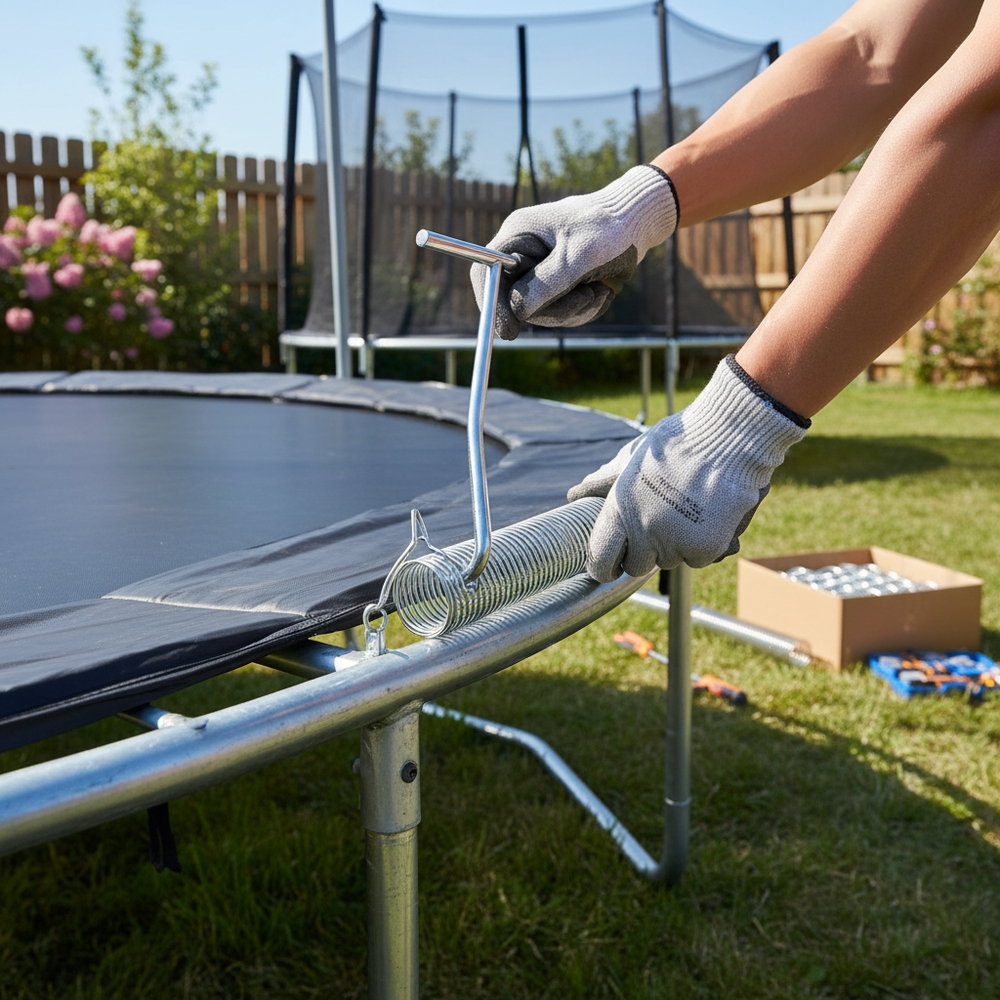
Never try to pull a spring with pliers or your bare hands. You need a T-Hook Spring Puller tool. Most trampolines come with a cheap one, but upgrading to a heavy-duty model with a comfortable grip will save your hands.
- Affiliate Pick: Heavy Duty Trampoline Spring Puller T-Hook (Set of 2)
4. Safety Nets and Pads
Once the mat is on, the hard part is over.
- The Safety Pad: Lay the foam pad over the springs. Ensure the tie-down straps are secured tightly to the frame, not the springs themselves. The pad must not shift when someone steps on it.
- The Enclosure Net: If your net uses fiberglass rods at the top (a premium feature), thread the rods through the net sleeve before lifting it onto the poles. It is much easier to do this on the ground.
5. The Final Step: Anchoring
As mentioned in our accessory guide, anchoring is mandatory.
- Install a heavy-duty corkscrew anchor on every main U-shaped leg. Strap them down securely to prevent wind-lift.
- Affiliate Pick: Trampoline Wind Anchor Kit (Heavy Duty)
Conclusion
Trampoline assembly doesn’t have to ruin your weekend. By preparing level ground, lubricating the frame joints, and strictly adhering to the Cross-Pattern spring method, you can build a rock-solid, incredibly safe bounce zone in under two hours. Grab your spring puller, enlist a helper, and get ready for years of backyard fun.